Monday 14 July 2014

Daisychain sampler 'E'

So the dreaded satin stitch with no edging, actually went reasonably ok. 


I back stitched first (apparently makes the edges nicer of your satin stitch), did the stem stitch for the lines you see, then filled with satin stitch. Here it is finished;


Wednesday 9 July 2014

Daisychain sampler 'i'

I know I had said I would do 'e' next, but the hoop was already in the right place for 'i' so I did that instead! Plus it's a pretty flower for the letter 'i'. Do you think I'm still avoiding doing something scary!? Shh! I'll do it next, promise!


Daisychain sampler 'h' continued

It has taken me a week and a half to pick this up again after  my holiday, but I really like how my letter 'h' has turned out!

Tuesday 1 July 2014

Tutorial: Bean bags

There's probably loads of tutorials for this, and am not saying mine is the best/right way, but this is how I did it, and have to start writing tutorials somewhere right?!

So, here goes;

Materials
bondaweb (for applique)
fabric a (for front)
fabric b (for back and numbers) For the set above I used three different prints
filling - I used rice, but can use dried beans

Step 1
Cut fabric a and fabric b - you need ten of each, mine were 4.5" squares.

Step 2
If you have a printer, find a font you like and print out the numbers 0 - 9, might need a bit of trial and error with size.

If not, you can draw them yourself like I did. I started by drawing a grid 2"x2" to ensure my numbers where a similar size, and just wrote the numbers in the squares. I then traced round making them into a edged font. 

Step 3
Use a window (or a light box if you have one), turn your numbers over, take your bondaweb and trace the backward numbers onto the paper side of the bondaweb. 

Cut them out and iron them on to the wrong side of fabric b (following the manufacturers instructions and  I used a pressing cloth to protect my iron). 


Cut out the numbers, take the backing paper off (I use a needle to gently make a little tear, I find it makes it easier) Place your numbers centrally on fabric a (right side of fabric), and press to stick them down. 

Step 4
Use your sewing machine to sew the numbers onto the fabric. Or you can do this by hand, you could use back stitch (pictured below), or a stitch to cover the edge like a blanket stitch.
Step 5
Next, take your backing fabric (b) and place it right sides together with your numbered piece and pin together. You then need to sew around the edge using a 1/4" seam, leaving a  2"- 3" gap on one side for turning and filling, remember to reverse stitch at the start and end point of the gap to secure your stitches. 
Trim your corners, be careful not to cut your stitches. Turn the right way, and poke the corners with a chopstick or pencil. Press your seams. 

Step 6
Now it's time to fill your bean bags, my funnel was too small, so I made do with protein shake bottle lid turned upside down (you could roll a piece of card to make a funnel shape if you have nothing else). Fill your bag, do not over fill, maybe around two thirds full. Ladder stitch the hole closed. 

I then top stitched around the edge of the bean bag, but had to be very careful and keep moving the rice away from the needle. I suppose you could do this by top stitching the three sides before filling then do the last side after you have closed the hole?!

Then all that is left to do is bury your knots.  
You can do this by pulling the top thread through to the back, knotting it with the bobbin thread and threading them onto a needle. 
Where the stitch finished insert the needle and come out far enough away to pull the knot through (and it not come out the other side).


Trim the threads close to the fabric, and it will disappear inside the bean bag. Last three pictures were coasters, but it works the same!!


The  drawstring bags were made using a tutorial by Ali at Very Berry Handmade, I reduced the size of this finished bag to 12" x 9"w.
and this one is reduced again to 11"x8"w

So, there it is, please be nice! 


Friday 27 June 2014

Daisychain sampler 'H'

Right so next is 'H', how do I feel about 'H'? Yes it's satin stitch, it's edged so hopefully will make it look neater, so could practice on this then go back to 'E'.  

I've back stitched again first, covering with satin stitch then will back stitch again in pale blue.

So I'm going home tomorrow, so will I get much time to carry on?! No, but when I get back into it should get a bit more done!


Thursday 26 June 2014

Daisychain sampler 'G'

Next is 'G', lots and lots of colonial knots. What do you think? Mastered these? About half way round my brain went to sleep and couldn't remember if it was looping over or under the second time, tried both, it's over!

Daisychain sampler 'F'

Lets go to 'F'! More stem stitch, don't think I'm too great at this, but hey it's done. 

Daisychain sampler 'B'

Now for 'B', stem stitch. I gave the instructions on this another read, think it's looking ok, wasn't sure on turning corners. Just for the second colour to do, I may leave this and get a lighter shade of teal when I get home. 

Where to next? 'E', more scary satin stitch or shall I skip it and go to 'F'? Decisions. .ok here's a picture of it so far.

Wednesday 25 June 2014

Daisychain sampler 'A'

Next is 'A'! Lets attempt this scary satin stitch.
I back stitched the petal shapes first then covered each in satin stitch, (it's meant to make the edges nicer). 


More colonial knots for the centre and then chain stitch. Quite pleased with how this turned out actually!

Tuesday 24 June 2014

Daisychain sampler 'C'

What's next?! 'C' obviously! Threaded back stitch in a beautiful blue, stem stitch, more lazy daisies and colonial knots in place of french knots. They have turned out much nicer than my last french knots. Just googled colonial knot how to, my internet connection was really bad, but finally got a page to load.

Daisychain sampler 'D'

Yes, I started with 'D', I know this probably seems wrong, but it seemed easier to start with a stitch I was comfortable with (back stitch) to give me the confidence to attempt the other letters. Especially when I've read how hard it is to make satin stitch look good, and needed to look up a colonial knot for 'A' too. Ok, so back stitch, lazy daisies and an edged satin stitch done, what's next?! 

Monday 23 June 2014

Daisychain abc's sampler

I bought this lovely pattern at the last minute for a holiday project this week, It's been pinned on my must makes for a while now, and  I had some kind of wall hanging in mind. 

As I didn't have much time to search online for fabrics to make a boarder, (it would have taken me ages to decide!), I based my colours on Pretty by hand's sampler as I knew I wanted to use a light background and the colours above would be too light (and dark) in places. I was expecting to use some fabric I already had, but when I got to Hobby Craft, I found a perfect one, so got that too!! Shh don't tell my husband!
I also took her advice and reduced the pattern to 70% to use embroidery thread instead of crewel wool. I couldn't find a pen with a small enough point to transfer the patten to the fabric, so I just used a pencil, the kind you click to get more lead. I had the pattern and fabric masking taped to the window and just did lots of tiny dots, killed my arm and a pen would have been easier but hey ho.  Let's see how long this takes! Wish me luck!

Monday 16 June 2014

my little girl turns 3

So my little girl is 3, I made a couple of little things for her; I made this bag without a pattern, and a little fabric watch.

Well who doesn't need a fabric watch?! I might make one for myself!


Monday 9 June 2014

New baby rosette

I made this last week for the new baby in the family. Hope they liked it! 


Here are some similar birthday badges I made last year.

Sunday 13 April 2014

Easter treats

Currently working on these Easter treat bags. I've finished three, and have two more ready to embroider. I'm making these for my little girls' friends' as a little Easter gift. Hope they like them!

Tuesday 8 April 2014

241 tote

One of my best friends was 30 the other day, I'd had in my head that I wanted to attempt a bag for her as she loves handbags. I spent ages looking at fabric and patterns. I chose the 241 tote by noodlehead, then  struggled with fabric choice. I almost let her in on it and let her choose the fabric herself, but then I found some while in a local shop. Didn't stop me worrying if she would like it! 


Anyway, she loved it, so I can finally share some pictures. I'm so pleased with it, and absolutely loved making it. 


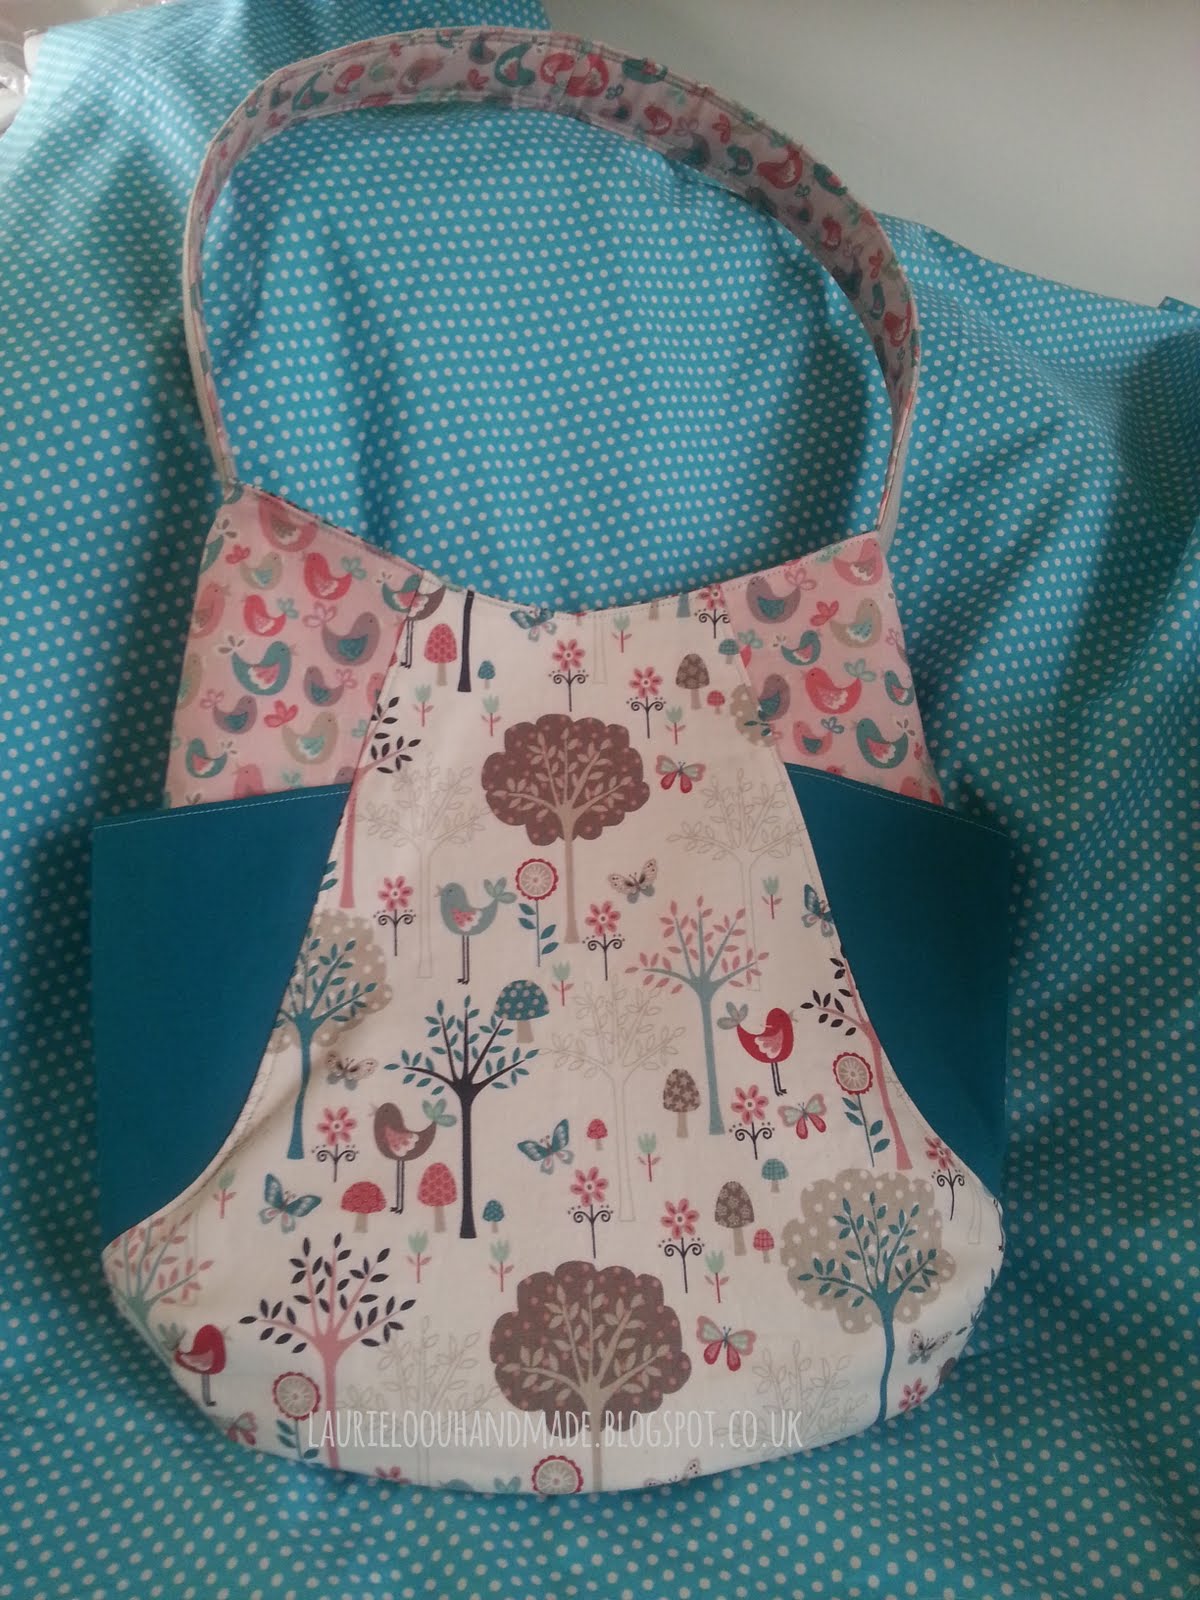
I added hidden magnets to make it close at the top, and really wanted to use two fabrics for the handle. As the bird print was directional, I did a join in the middle, so the birds were all the right way up! 


I bought 1/2 metre of the three main fabrics, and used almost all of the flowery one for the lining, but have some left of the other two.  Flo's Garden by Makower, is only available in-store in Hobbycraft, but I found it herehere and the collection here. The other two fabrics I used were Essex yarn dyed linen in flax, and Birch Organic Fabrics - Mod basics in Teal.  For the interfacing I used Vilene G700 for the pockets, to reinforce the  lining behind the inside pocket, for the hidden magnets and Vilene S13 was used in the handle.